Had to install a new AC in my moms room and then was planning to go to Long Island. Had some last minute changes so ended up back home. Put on some tunes and continued digging into my Audible Illusions project.
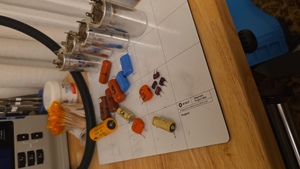
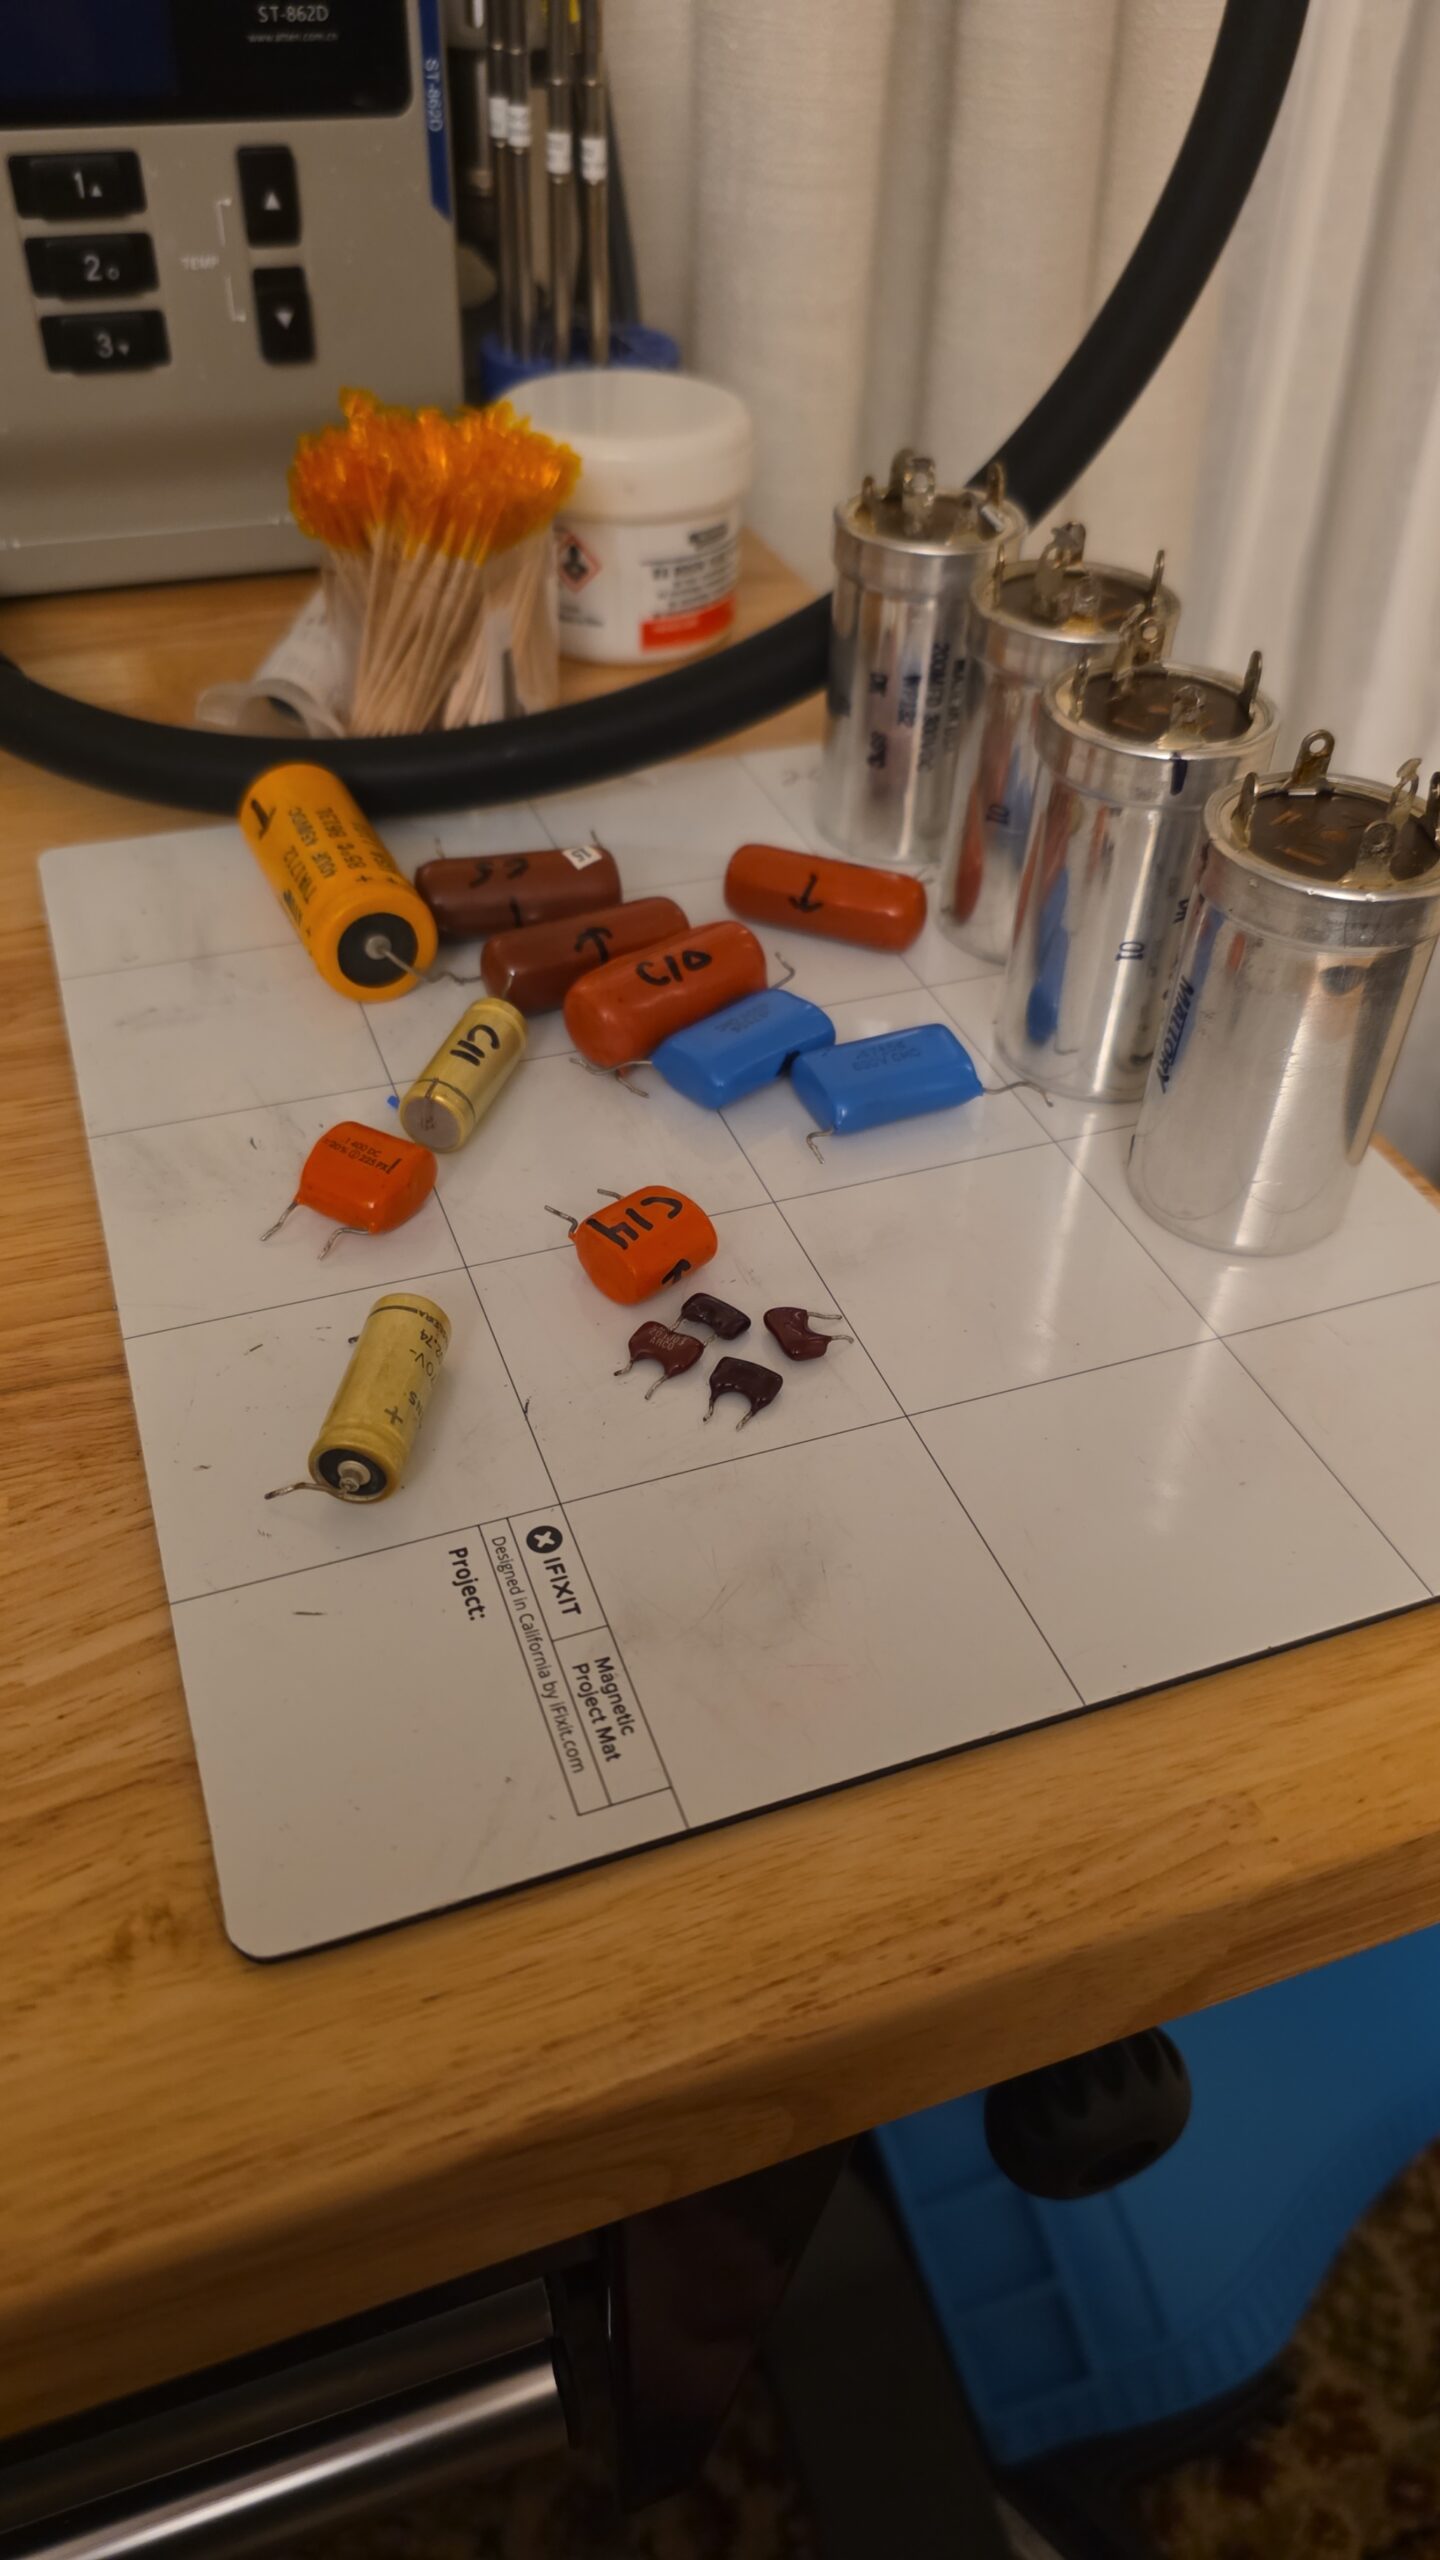
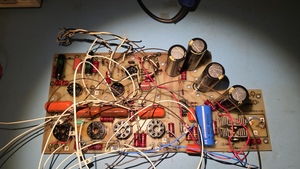
I remove the old capacitors, some of them really look like candy! Hard to find equivalents of some of them. I ended up putting back 4 of the orange drop caps because I was not able to find new ones rated at 800VDC. They test ok and from what I have read they tend to last unlike electrolytics.
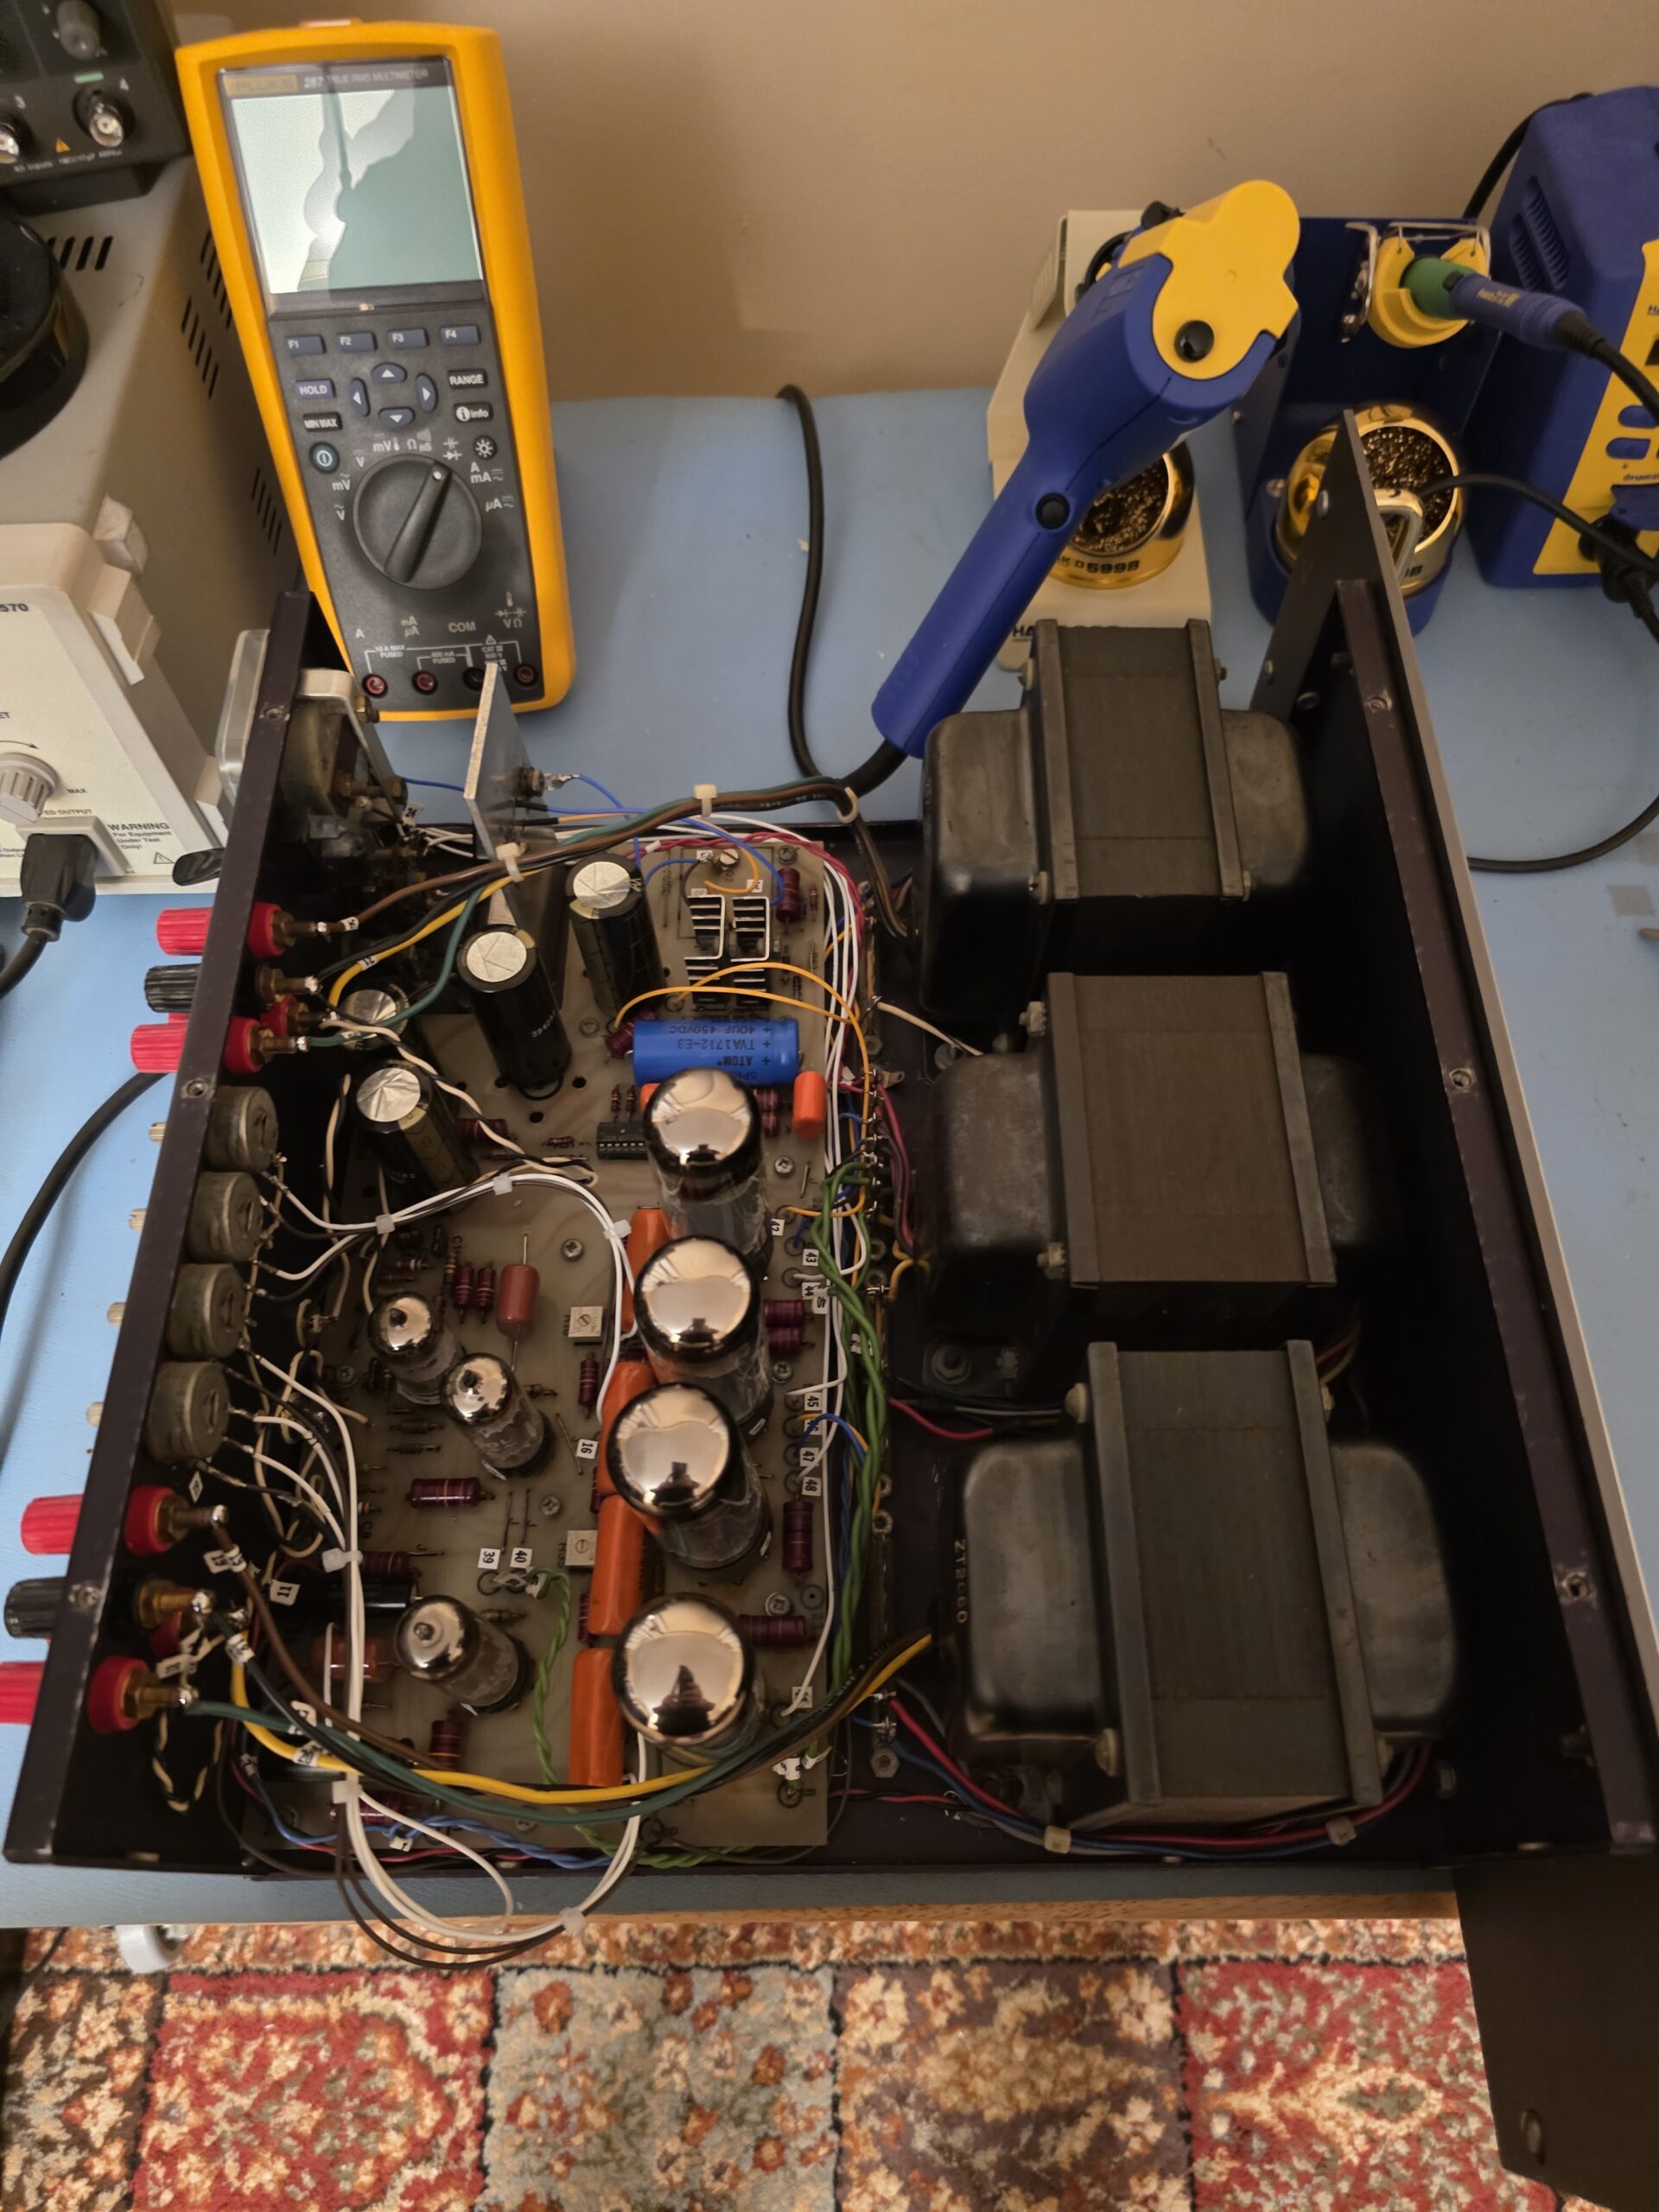
I replaced the the big Mallory caps ( aluminum ones in the picture) with some super nice but way smaller in physical size AudioNote caps! I had some challenges getting them to fit since the Mallory’s were way larger in diameter but I was able to come up with a solution. I also had to go to the super old spec sheets to decode the polarity. The older caps used symbols not a simple positive or negative mark. Turns out the case is negative and the symbol(s) are positive.
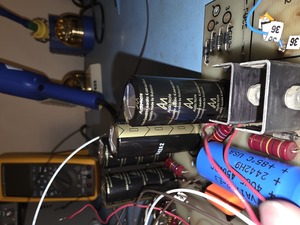
AudioNote caps are a little bit expensive but I think this unicorn of an amp is worth it. And yes they are real, didn’t source them from e-bay. Got them from the Parts Connextion. The amp had a hard life in the past. Looks like it had a violent failure that took out some of the traces on the circuit board. I found it with some bodge wires. Very sloppy work. Here is what I did:
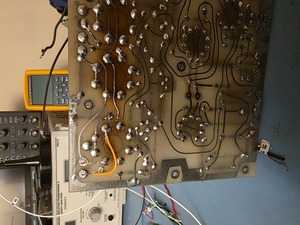
I also tried to make it less obvious with this attempt.
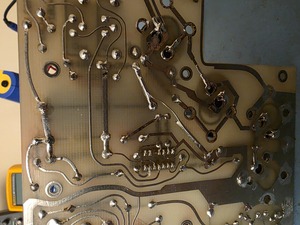
I think the second one looks more stock, if you don’t really inspect the board you can’t see it. Very happy with the results. When I got this amp it was covered in nicotine residue on the top and tons of flux residue on the bottom. Still have cleaning to do but it’s looking alot better. Maybe in the future I will get a bigger ultrasonic that can accept a fill size board. That would be alot easier then the IPA and q-tip method I have been using!
Going to start on the case and other bits and bobs next. I will get all the jacks and binding posts into my small ultrasonic to get the years of crud off. I also have to clean the bias meter, bias pots and tube selector switch. They need some TLC but nothing Deoxit can’t handle. Will post more when I can, for now happy listening!